Thursday, September 29, 2011

Accessory Antlers

I love all of the necklace holder alternatives out there, especially the ones using antlers and rake heads. What a great idea to have them on display all the time. I just had mine tucked away in my closet...they probably thought I was ashamed of them.


Luckily I was able to find my antlers at The Country Living Fair. Only $5 for the pair! What! The problem was that they were not yet mounted. All I needed was an unfinished wood plaque from the craft store and a piece of floral scrapbook paper. To start, lay the paper over the plaque and rub your finger around the raised edge...


I found that to be the easiest way to mark where you need to cut.


Cut out your oval then paint the lower part a color of your choice. Once the paint dries lay your paper in place and mark where you want your antlers to go.


I cut out small holes in the paper where the antlers would go so I would know where to drill my actual holes. Now you can glue your paper in place. I just used mod podge. To make my plaque look finished I sanded down the sides of the paper to get rid of any overhang and make it one with the wood...


It's time to drill some holes. I would drill through the wood and also through the antlers first to avoid splitting them. 


Holes in antlers...


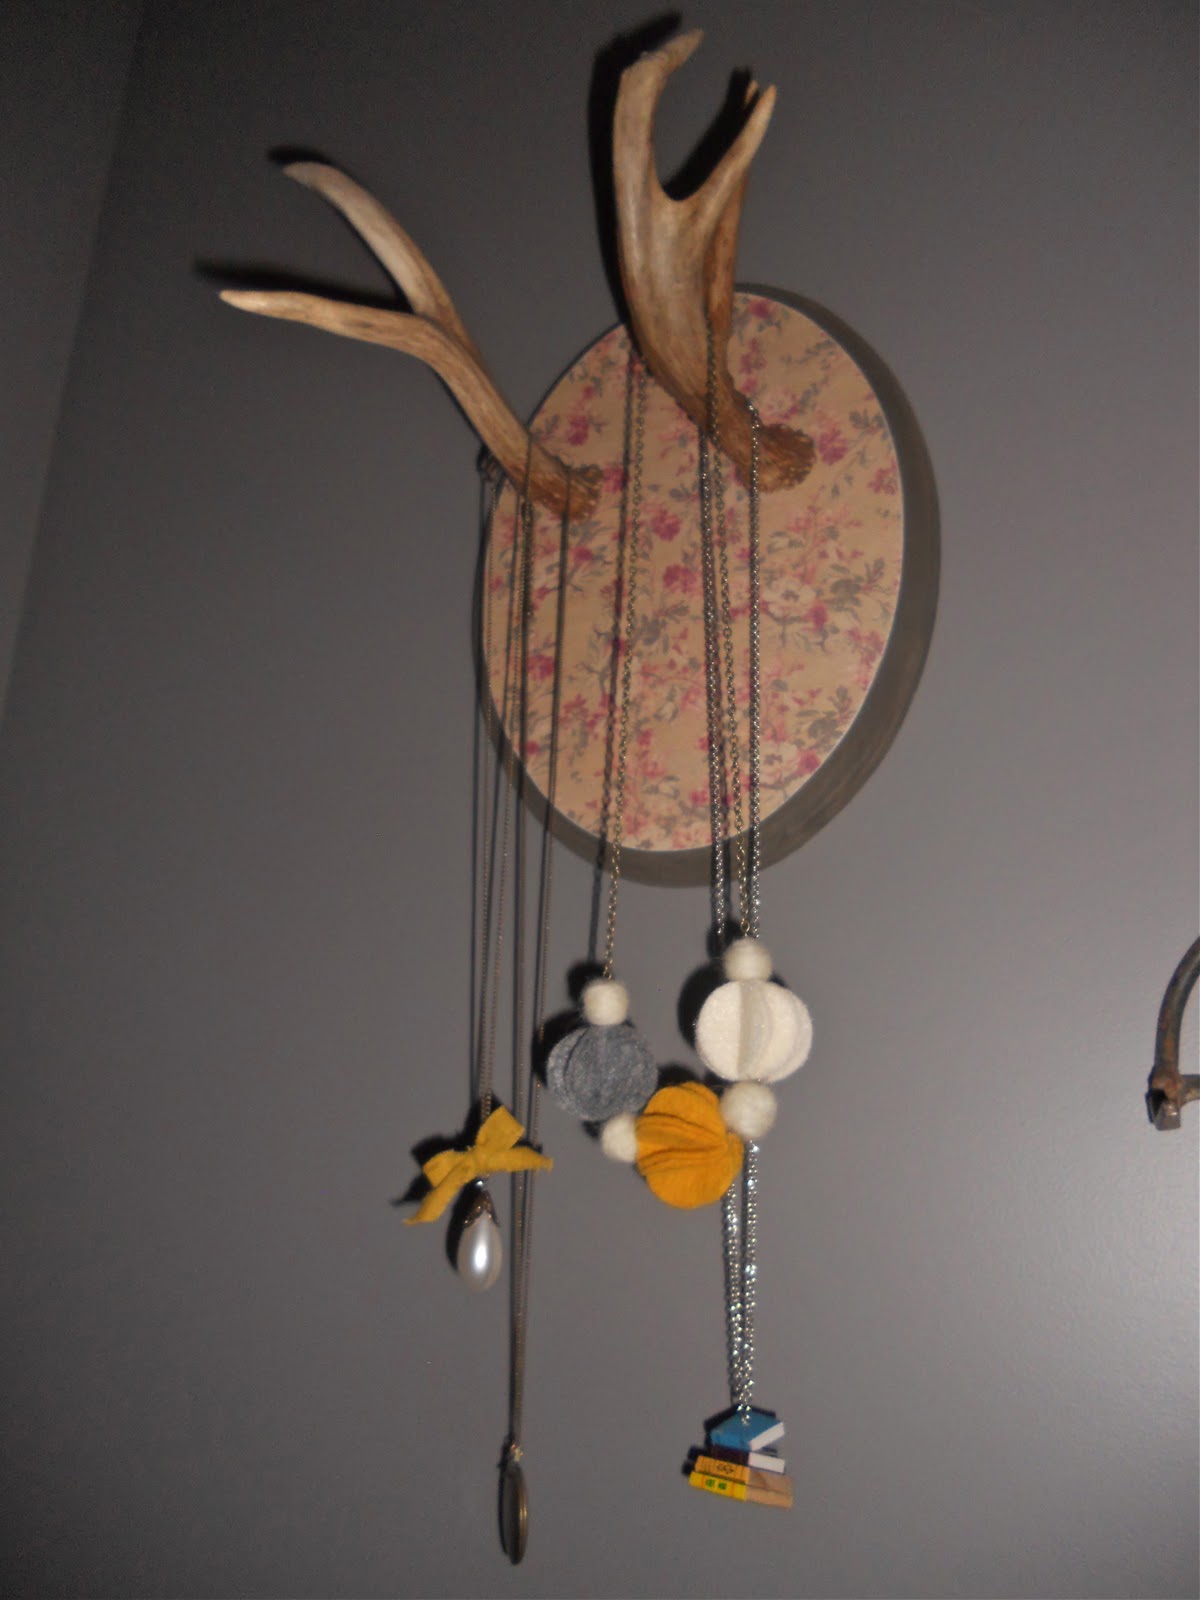
Almost done! It will be worth it, I promise. Finally all you need to do is hold your antler in place and put a screw through the back with a screwdriver. Make sure to attach your hanger before screwing in the antlers though.


I love it! Also, I was able to customize it by doing the work myself. Who knew an animal part could look so feminine?


My mother in law knew I was in search of a rake head as well so she bought and sent me one she found for $5 at an antique store. I think they work well together.


And again...


I will be linking up to The Shabby Nest and French Country Cottage this week. 
Thanks for stopping by! 

Monday, September 19, 2011

The Country Living Fair

Last Saturday Joel and I went to the Country Living Fair with my in-laws. It was a long but fun day filled with eating, shopping, and some more eating! 


At the entrance of the fair was a cute lemonade stand in a vintage RV.


The tiny buildings were also sweet...


Some Fall decorations...


and live entertainment.


We had Jenni's ice cream!


The booths were so cute and packed full of antiques and treasures like this window frame greenhouse...


and this couch. It was only $200! Needless to say it was sold before we got to it.


The fair was not only good for antiques but I also got so many great ideas from the crafts being sold. These are clear ornament balls filled with moss and feathers.


We did so much walking Saturday we tried to take a break whenever we could get one.


Something we learned the hard way and will know for next year is to bring a cart!


We found some great treasures...


including a teeth mold, deer antlers, potato bags, milky glass jar, pots and caddy, old drawer, and a rusted fence. 


I also found some great odds and ends for my craft room!


Some letter flash cards...


and prints to frame for the bathroom and kitchen.


My favorite purchase from the day has to be my Country Living Tote.


Hopefully this will motivate you to go next year. We went to the one in Columbus, Ohio and this year they also had one in Atlanta, Georgia. You can even choose to buy a 1 day pass or a weekend pass...to pace yourself and get the full experience.


Friday, September 16, 2011

my answered prayer

I wanted to start something new this week but this isn't it...so instead I thought I'd share how God has answered a prayer request I've had for about 3 years now. Nearly 3 years ago I became a substitute teacher and if you have done this before you may know where I am going. Subbing is a tough gig and one that began wearing on me quickly. I realized I love kids but in moderation. Last year it got to the point that if I got called/woken up at 6 in the morning to sub last minute I began to shake and felt sick to my stomach even. Some mornings it was all I could do not to cry on the way to work. I know, I sound crazy or you're thinking, "why didn't you get out of this sooner?" It was a job I could do fairly well and my husband is a teacher so it was nice having the same schedule as him. I also do not do well with interviews and talking about myself so I thought if I could just stick it out at least until I got pregnant or we won the lottery that it wouldn't be so bad...
This brings me to my answered prayer. I knew that for me to get out of a job I knew I could count on, something else/better would have to fall in my lap. A couple of weeks ago a friend of mine mentioned her mom needed to hire someone else at her alteration shop and that I should apply. I really didn't think I would be qualified for it but she put me at ease that I could be worked up to doing more once I learned the basics. I applied, interviewed, which was the most comfortable I have ever been in an interview, and got the job! After I found out all I could do was cry and thank God. To get to do something I know I will actually enjoy and to learn skills that will help me in the future...I could not have asked for anything more perfect for me. 

Monday, September 12, 2011

"the bird and the b"

Yesterday my friend Bethany and I were part of a craft fair. We learned a lot and had some great feedback. Someone even told us we would fit in at the Country Living Fair, which I took as a huge compliment. I am already excited about the possibilities and this was only our first show. 


We strung hankies and doilies to hang from the ceiling of the tent. We used suitcases and drawers to display our merchandise which also made packing and unpacking a breeze. We are "the bird and the b"...


From left to right we had zipper, yoyo, bird, and owl brooches. Bottle cap push pins and magnets. 


We had necklaces, earrings, rings, jewelry bags, and hair pins.


Pinwheels on a stick and pinwheel bows. Felted acorns, gift tags, and bookmarks.


I made a surplus of each item so I will be opening my etsy store VERY soon. Please check back for more details!

Saturday, September 10, 2011

Repurposed Card Catalog

I still have a hard time believing this piece of furniture is really mine and I didn't even have to pay a penny for it! 


The library at the school I went to was just giving them away...what the what? I know.


I must admit this isn't the most complicated or inventive project but one worth sharing. As you can see the card catalog has 60 very narrow drawers, which to me means 60 junk drawers. There was no way we'd ever remember what was in each of them so we decided to dummy out 2 rows on top and 2 on the bottom like so...


To do this we detached the top drawer in our 2 drawer combination.


Once the face was removed we connected it to the drawer that would be directly underneath it with a T-Bracket.


And the front...


We loved the original look of the card catalog, knobs and all but since we were going to be filling the drawers with movies we needed to detach the rods.


A grinder took them right off...


Now we have a beautiful and functional card catalog that no one would ever guess is housing dvd's.


Thanks for stopping by! This week I will be linking up to Miss Mustard SeedThe Shabby Nest, and French Country Cottage.

Wednesday, September 7, 2011

fancy rings

I love gaudy fancy rings! I thought I'd not only advertise what I will be selling this weekend at the craft fair (this Sunday in Mariemont, Ohio from 11-5) but also maybe inspire you to make your own jewelry. You can put just about anything on a necklace or ring and it will probably look cute...I will show you.

For this ring you will need clear vase gems (they should be flat on the bottom), E-6000 or other clear adhesive, ring with flat surface, and cute scrapbook paper.


So first I take my gem and place it over the paper I'd like to use just to make sure I can see whatever the image is. It will be magnified slightly. Once you choose your paper  trace around the circle on your ring or eyeball it...


Glue the paper in place and give it time to dry as seen in photo below. That way the paper and gem won't move around on you while the glue is wet. The finished product is cute but I could not take a good picture of it by itself. (scroll down to the final picture to see finished product)


I am actually really impressed with myself for this next one. I told you you can put anything on rings these days...


I don't know why I originally bought these little farm animals but I'm glad I did. I chose to use the horse for my next ring.


I glued the horse down first with my E-6000 then I used the dried mossy stuff you can get at the craft store to fill in the spaces around it.


Here are a few others I will be selling...a button ring, tea cup w/saucer, and a rick rack flower.


I cannot take credit for the rick rack ring on the right but click on the link for a great tutorial to follow. They are so easy and cute! I will be linking to The Shabby Nest this week.