Monday, August 30, 2010

where the magic happens...my craftroom!


This specific room has been through several changes since we moved into our house. After it was gutted and newly drywalled it quickly became the catch all room. About a year after we got married my sweet and observant husband decided I needed a craftroom...better yet, a room I could house all of my junk in. He set it up to surprise me and I could not have been more excited to have a space of my own to decorate how I wanted to.


I love purging things and organizing so the couch and egg shaped table had to go. This really opened the space up for less clutter and made the room feel like an actual space for crafts rather than a place to store things.


I chose a calming gray color for the walls because I knew it'd be a room that I would spend a lot of my time in. We found this chair in the Ikea As Is section for cheap so now Joel can feel welcome in the craftroom...


I feel organized and inspired in my craftroom.


The organizer above my bookcase is from Michael's and I got it half off with a coupon. It is a must have in a craftroom and so handy for odds and ends.


Where the magic happens!...ah, I must admit I typically take my materials into the living room to work while I watch TV with Joel...my desk stays cleaner that way.


Saturday, August 28, 2010

chic yoyo pin tutorial


Yoyos have been around forever...I think. My mom taught me how to make them and her grandmother probably taught her how to make them. Craft stores sell round plastic guides but this method is less complicated and cheaper. You will want to put a yoyo on everything once you see how simple they are to make. 

What you will need for this project: 3 different sizes of circles to trace, 3 colors of fabric, scrap felt, pin back, 3 pearl beads, needle & thread, glue


To get started you will need to trace your 3 circles of various sizes to use for the yoyos and cut them out. Also, you will need to trace 2 more circles onto the scrap felt, this will be used for the back of the pin. I make those circles slightly smaller than my smallest yoyo circle.

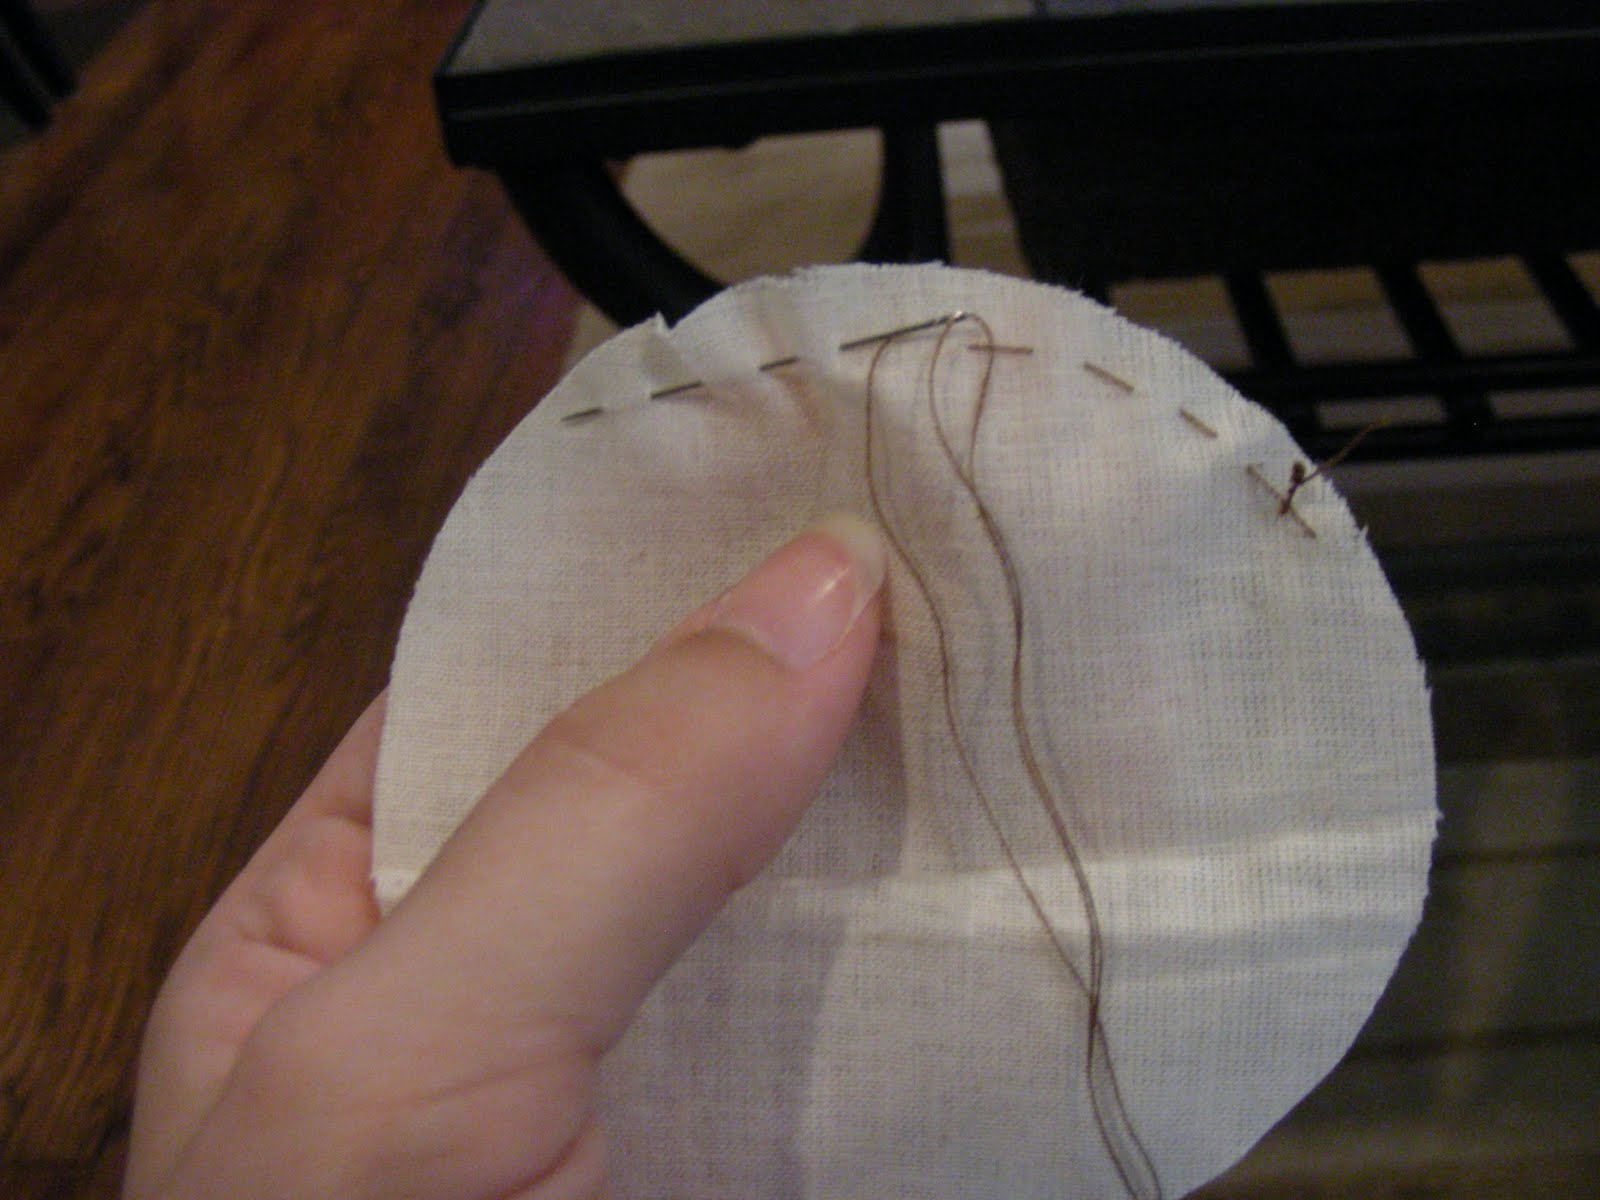
Now you should have 3 circles to make your yoyos out of and 2 felt circles. We will start with the largest yoyo circle first. You will need a needle and thread now. I try to choose a thread color that matches the fabric so that it will not stand out. Knot the end of your string and start with your needle on what will be the inside of your yoyo circle.

At this point I make another knot around my first knot so that when you pull your yoyo tight your original knot won't come through the fabric. This will be the inside of the yoyo so make sure you can see the knot on this side. Continue this in and out method until you reach where you started, with the thread coming through this side.

Now pull your yoyo gently but making it tight. Once your yoyo looks like this put your needle right through the center to knot what will be the back.


Take one felt circle to attach your first yoyo. You can go through the center of the yoyo a couple of times to secure it to the felt. The other 2 yoyos are smaller so I typically don't leave much room on the felt for them and the yoyos will overlap that way.

Now you can add your first bead. The bead holes are not very big so I just put the thread through it twice to make it more secure on the yoyo and knot the back.


Now you are ready to continue the same process for the medium and small sized yoyos. For the second and third yoyos I make a small stitch underneath to secure them to the bigger yoyo.

Once you have attached all three yoyos and pearl beads you will need to attach the pin to the back. All I do is start with the middle hole and work around the pin back until I have put my thread through each hole twice to secure it.

The back of your pin probably looks very messy at this point...hence the second piece of felt! I usually lay the second felt circle over the pin to determine where to cut my holes for the clasp part of the pin to go through. Open the pin and apply some glue before you attach your second piece of felt. This will give the back of your pin a more finished look.


You should now be left with a chic yoyo pin that your friends will be begging you to make for them.


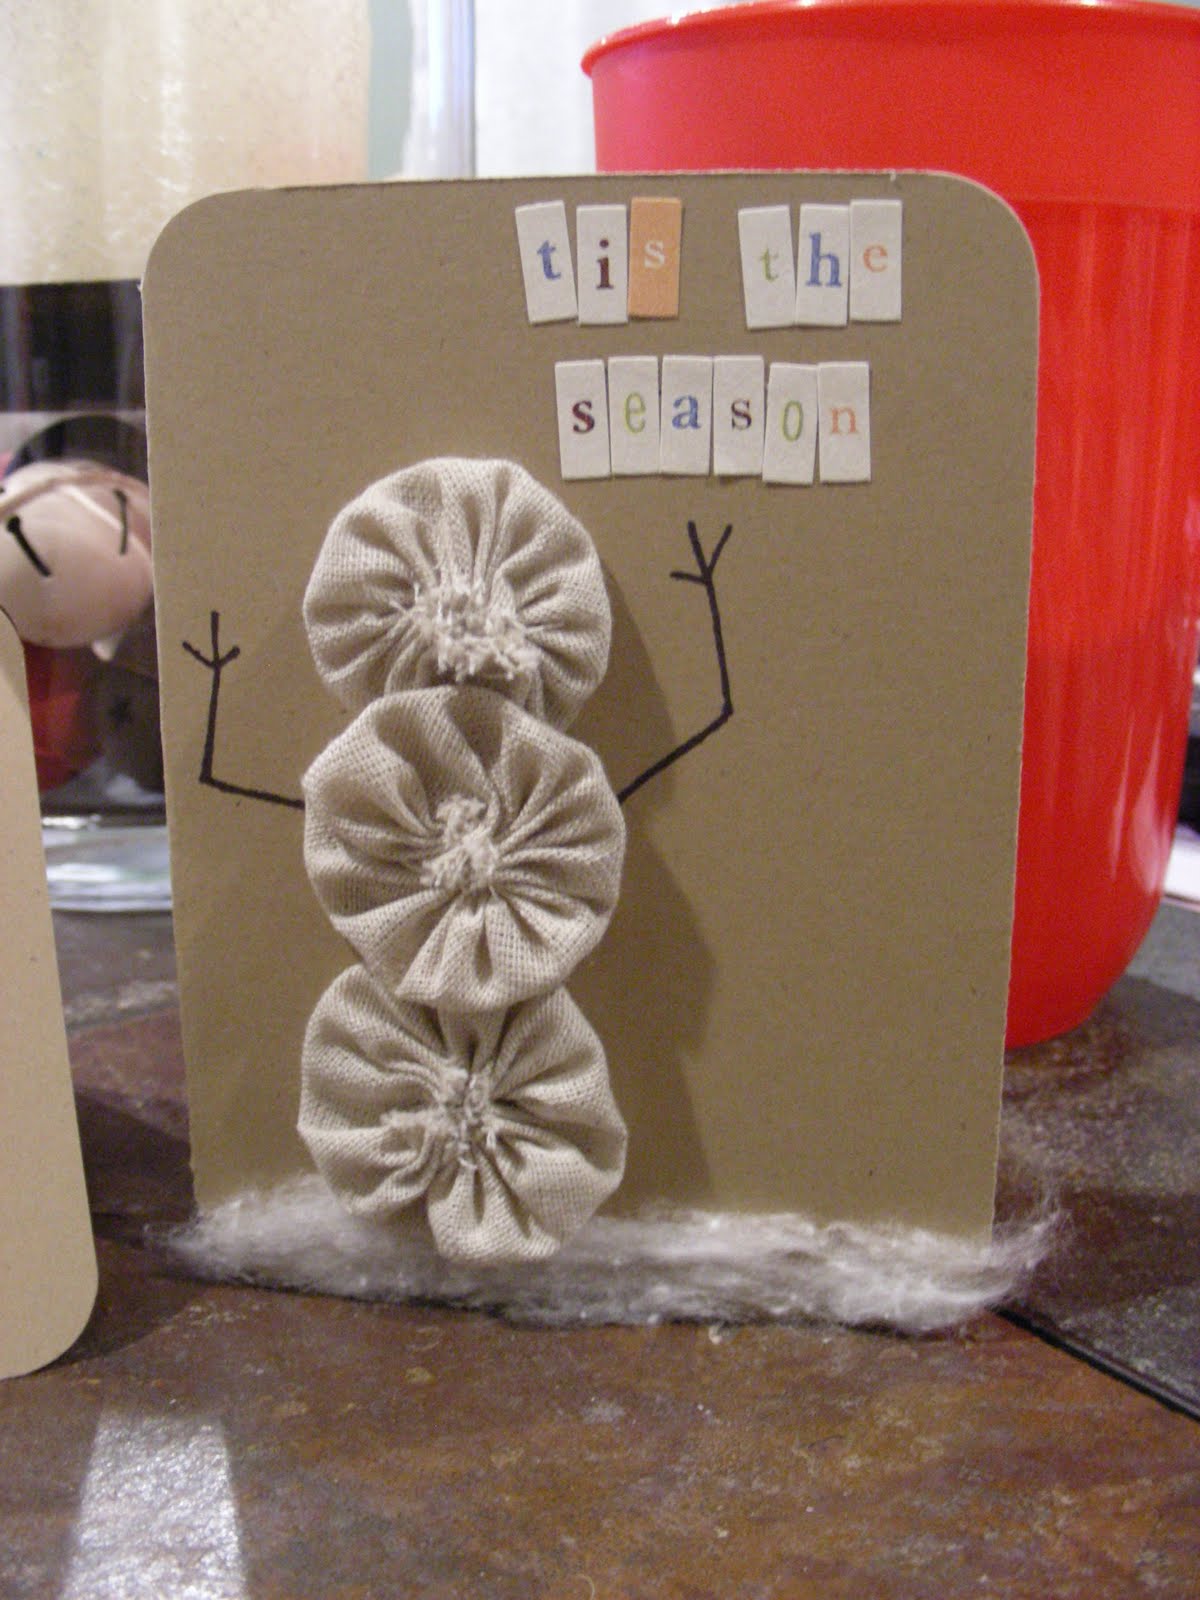
Here are a few other ideas you could use, if pins are not your thing...


Thanks for stopping by! 
                             

Wednesday, August 25, 2010

new bedroom

This summer my husband and I decided to take on a huge undertaking...HUGE! A master bedroom remodel. Our bedroom was the entire upstairs of our house so we had plenty of space for furniture. However, the room we are now using as our bedroom was the guest room on the main floor and is drastically smaller. We just hoped and prayed our stuff would fit into it...
This is what the guest bedroom looked like before.


We payed a little extra for the paint and primer in one which was a great choice. We didn't even use a whole gallon for the room. The color is pewter gray.


I got the accent pillow cover idea from a shop on etsy. It was my first attempt at making pillow covers so I am happy with the result.


Our new room has less storage so we bought an inexpensive wardrobe from Ikea to go with our dresser.


This is a pallette we got from a friend to store my shoes in.
I just had to sand it, put polyurithane on it, and attach casters to the bottom.


Above: I covered an old hat box with material from a shower curtain we had to use as extra storage. The scarfs are hanging off of something I found in the Ikea "as is" section. I just added some decorative knobs to the slats.
Below: For my husband's side of the dresser we hung an old painted coca cola crate to hold his ties. 


We ended up with a little extra space so we decided to add some seating in front of the window. This is a miniature church pew we found at Building Value for a great price.

We could not be happier with our new bedroom! Hopefully it will motivate me enough to tackle the upstairs mess now...

Monday, August 23, 2010

freshman 15...errr i mean post wedding 30!

To be honest with you I didn't even know what the phrase "freshman 15" meant until i graduated college. I thought it meant you gained weight from eating junk food, not from drinking. I was a good naive christian girl. I was lucky enough to lose weight in college...thanks to a parasite from the Domnican Republic. It was the best diet ever. Anyways I now am a proud owner of jeans, a plethura of jeans in every size I have ever been. I blame marriage! I loved the weight I was at when I married my husband. I could wear what I wanted and I actually enjoyed shopping. Now I head straight for the purses and shoes. They don't dissapoint and they always fit you. I have put on a good 30'ish lbs since my wedding day which was almost 3 years ago. All that to say I love clothes and I have a horrible habit of shopping for that pre-wedding body I once had and hope to have again...one day. It is crazy. My husband looks at me like I am crazy to be buying a size I no longer am but I think if the dress is cute enough I will be motivated to do something. The following are my "motivation dresses". I just imagine how I will feel in them and what shoes I will wear with them. I imagine we will have money, lots of money and will go some place fancy so that I can wear them out.

1. I got this one at Target a couple of years ago. Yes, it still has the tags on it. I just thought it looked very classy and that it would go well with my dark hair.


2. This one is a coral color, also Target. I actually intended to buy one in my size but I could not bring myself to get the size I needed...some more crazy for ya, I know!


3. This is by far my favorite thing I own. Last year my husband and I decided we could have $100 each to do what we wanted with after we got our tax return check. I knew what I wanted/what I needed. An Anthropologie dress! This one was on sale online and lucky for me it was the last one in the store and it was my size a size I could squeeze into at the time. I knew it was meant to be. I love this dress. I am however at a loss for what color of shoes to wear with it?
That is my ugly secret for you. I buy things I can't wear. This is my year though...I hope.

Why Ruffled Feathers?

                                I am glad you asked! I like me some birds...


...I also considered "Dirty Birdy" as my blog name but decided against it. I'd hate for someone to stumble upon my blog because they were searching for something else...

Friday, August 20, 2010

freebies

Over the years we have been given several things for FREE that we have sanded or painted to make them our own. The first was given to us by my husband's mom. What is now a bench started out as 2 separate chairs we were using on the front porch. We gave them a fresh coat of paint, removed the cushions, and attacked a scrap piece of wood to the top to make the chairs into a bench. We love it and use it in the living room for extra seating or move it to the dining room when we have extra guests at the table.


The second piece was some extra fencing our friends didn't need so I took it to hang baskets on in my craftroom.


The third piece of furniture we got for free is by far one of my favorites and still hard to believe we got it for FREE! A year ago I found it on Craigs List and fell in love with it. We were ready to pick it up and pay $50 for it but my husband unexpectedly lost his job that same week. We decided we shouldn't be buying things we didn't need...even though I thought I needed it! So when my husband called the lady back to break the news to her that we could not buy it from her she forced it on us for free! It needed cleaned badly but once we did that and painted it it was somewhat like new again...